The first mistake I made was not making camping reservations before arriving in RMNP. Epic fail on my part. With sites being reservation only now, this left my friend and I sleeping in the car the night before we hiked. We shared alot of laughs as we made macaroni and cheese in the parking lot and slid into our sleeping bags in the front seat of her Subaru. Make sure you make reservations early. Sites will be booked by late spring.
Choose the day with the least percentage chance of rain. Afternoon rains are common over Longs, and it is crucial to pick a good day for this hike if you are planning on making it up and back in one day. Pack your bag and lunch the night before.
Packing List:
- Camelbak- I usually pack about 2 liters of water. I also bring a Gatorade or some sort of electrolyte drink. Make sure you have enough water, however the more you pack the heavier your bag is.
- Snacks/Lunch
- Sunglasses (Not needed until on your way back down)
- Headlamp (Needed on way up)
- Wear Layers! The morning and summit is cold, however gets very hot on the way back down. I tend to start out wearing hiking pants with shorts underneath. Top layers start with fleece, long sleeve, and tank top or T-shirt.
- Hat
- Sunscreen
- Gloves (with rubber gripping will be helpful)
- Hiking boots/shoes with good grip- good socks that won't give blisters
- Camera
- Bandaids/small 1st aid/Tylenol
- Rain Jacket
- Rain cover for backpack
- Toilet paper
- Compactible hiking poles- must fit into backpack once you start scrambling after keyhole
The hike will immediately begin with a steady incline and will continue to get steeper with switchbacks through the woods. The trail is well marked and you will pass a few streams and bridges. You will cross the last bridge/waterfall when you reach this Alpine Tundra sign. This means you will soon be getting above the treeline. Once passing the treeline, the views get beautiful as you can see the lights from the city of Boulder and all the headlamps of people hiking up below you.
About a mile later you will come to your first fork. Turn left towards Peacock Pool/Chasm Lake. Once going left is where the real steps begin and you are climbing the "Stairway to Heaven" as I call it. This entire hike is a great butt workout!
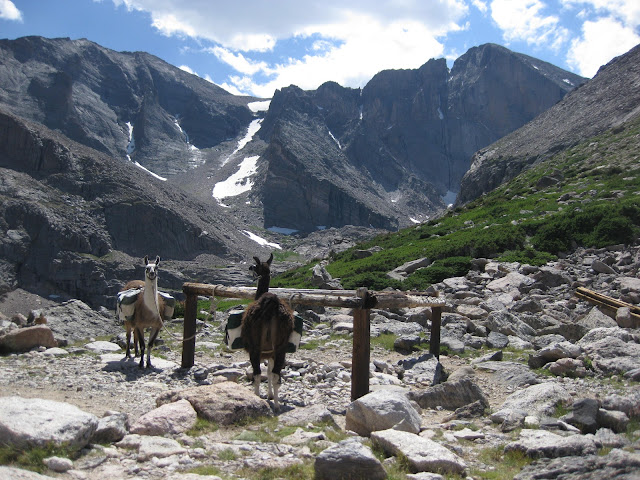
At the top of this you will have reached Peacock Pool (behind the Llamas), which is also the location of the first toilet on the trail. It will be dark when you reach this point on the way up, but this is what it looks like in the daylight.
There will be a sign to turn right towards Boulder Field once reaching these horse corrals. Hiking this section towards Boulder Field you will see lights from hikers headlamps above you. Although you keep thinking you must be near the top, it keeps on going for what seems like forever. The sun should be starting to rise as you near Boulder Field. You will see the Keyhole in the distance which is the direction you keep hiking towards. Hopefully you will get the benefit of a beautiful sunrise!Sunrise at the keyhole.

Here you can see Boulder Field behind us with the Keyhole above our heads. Keep hiking up towards the keyhole and go through it.

At Boulder Field will be the second and final toilet of the hike. This is also the location of overnight camping. In the morning everyone is usually very quiet as we walk past tents with sleeping campers in them. Climbing up the boulders is usually a slow process. By this time it's getting harder to breath. Once reaching the Keyhole its a spectacular view on both sides looking out.
This is looking back over Boulder field that we climbed up. The rocks might look tiny, but they are actually huge boulders. When you are sitting at the keyhole, people hiking up will look like tiny ants coming up from below.
This is sitting in the keyhole.
This is looking down on the other side of the keyhole.
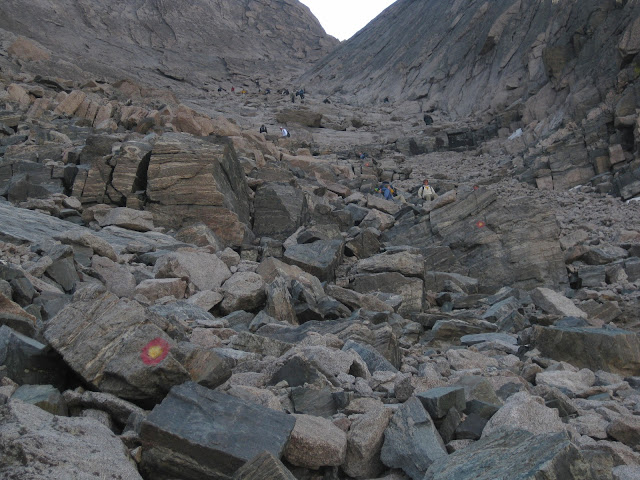
Once getting to the keyhole is where the real fun begins. If you think you have worked hard to get to this point, the last 1.5 miles will be even more tough than the first 7. Once climbing through the keyhole you will turn left and follow the spaced apart bullseyes painted on the rocks to make your way transversely along the side of the mountain.
Make sure you follow the bullseyes closely, as they will take you the safest route. There are a couple areas where they have metal handles drilled into the rocks in order to give you hand holds to climb up rocks. Here are pictures of the first section after the keyhole before reaching the Trough.
This is what I look like every morning when I have to get up early. Not a morning person obviously.
After about a half mile you will reach the Trough. This is a steep section of falling rock that makes switchbacks. This can be dangerous because the rocks are unstable which can cause small avalanches of rolling rocks when people are hiking up or down. Be aware of your surroundings and listen for rocks crashing down. This is the hardest part for me and when the elevation starts making me feel a little sick. When you are almost to the top there is a large boulder that you have to climb up and may need assistance. One older man turned around when he got to this point because he couldn't make it over. I felt so bad, considering he was so close to the summit by this point. I've had people hoist me up with their hands.
Looking up the Trough.
Looking down the Trough.
When you get over the boulder at the top of the trough it may look like a dead end. Nope. Actually, if you turn right and then look alongside the mountain ledge to your left you have now entered The Narrows. The first time I attempted the narrows I thought I was crazy. Its a short section, but seems long enough as you slowly make your way through a crevice in the side of the mountain. The narrows is one of the reasons why its beneficial to leave early in the morning, besides the fact of evening storms. Since there is only room for one way traffic, leaving early can alleviate the problem of running into people on their way down from the summit.
Since I'm usually concentrating during this part I don't have very many pictures of the Narrows so this is the best I have. That is why a GoPro is on my list so I can get pictures hands free!
After the short section of the Narrows you will reach the Homestretch. My husband however calls it the Devils Slide. The word homestretch is a misrepresentation of this very steep, smooth rock that will require you to find hand and foot holds. Everyone I have taken has found this to be the most technically difficult and scariest part interestingly.
Looking up the Homestretch.
Enjoy some lunch (more like breakfast since it'll be around 8/9am) at the top. Sign the registry. The top is very large and flat. You can see Peacock Pool and Chasm Lake from the top. I can often times get cellphone reception at the top and have sent pictures to my mom to let her know I made it up at least okay! :)
Successful climb! Happy to be at the top!
Some of the elevation symptoms I usually get are a deep cough, headache, and tingling from my arm to fingers. For some they may not feel any elevation symptoms though.
Many people are scared to go back down because of how steep the homestretch is. I guarantee you the way back is easier and will go much faster. I just stay low and slide my way down!
From the Keyhole back to the car it can get very warm as you get lower in elevation and the temperature starts to rise midday. This is where removing layers comes in handy. It also is when I drink the most water. I have gotten caught in a few hail/rain storms on the way down which is why its important to leave early in the morning and starting heading back early afternoon as well.
Have any of you hiked Longs Peak before? Any tips from your experience?
Whats your favorite hike?


No comments:
Post a Comment